Saturday, January 4, 2014

Working small

It's a new year, and time to think about what I will work on this year. I see it as an opportunity to reassess where I've been, and what I've been doing. And, to spur some new ideas in the studio! I'm still making up a list of shows to enter, and other goals for the year.

SAQA is doing another trunk show in 2014 and requesting pieces that are 10" high x 7" wide. As I've said before, it's hard to work that small, but good practice. Working small means the composition better be very clean, and the details interesting.

I started by pulling a sketch out of a sketchbook to see if I could develop it into something pleasing.
The Sketch:

I liked the spirals running into each other and their interplay. Unfortunately, I didn't think through how I would actually do it in fabric. (Yes, I have been working with fabric for years, but sometimes I forget how hard it is to make it do things that could be done with paint.  Duh). I had a couple of pieces of newly dyed fabric that worked well together, so I cut out a background, fused another fabric and then cut some thin strips of the fused fabric on the bias.

In the past, I've fused curving lines with no trouble, but working in such a small frame was challenging. After fusing the spirals onto the background, I realized I would need to hold the fused pieces down with stitching, so the edges were satin stitched.

You can't tell from this little image, but the satin stitching looks awful. And where the spirals meet, it was very challenging to maintain the tension between the lines and still keep the stitching looking somewhat consistent. I also used the piece to practice some couching, which didn't work well. It needed an interfacing.

Back to the cutting table!

I decided to change the spirals from butting into each other, and instead, I put them in a vertical orientation. I also thought the cross like lines in the background of the first piece were distracting. Starting over again with a similar background and fused fabric, I ended up with the design below. Instead of trying to satin stitch it, a piece of tulle was placed over it, and then free motion machine stitched. It seemed to be getting a nice rich feeling to it so I kept threading new colors in the machine, and adding to the spirals.

When the piece seemed finished, I read the instructions and saw that the edges had to be finished. So a border was cut out of the fused fabric and after fusing it all the way around, it was stitched down.
I like it. What do you think?

Sunday, December 22, 2013

Surface Design encyclopedia?

My friend Cheryl Rezendes has written a fantastic book that seems to cover every possible surface design technique. I've bought a couple for gifts, and wanted to recommend it as a wonderful resource for any artist friends who love to have new techniques at their finger tips, or a good place to review methods.
It's well written, and there are tons of photo's and diagrams. I'm not just saying this because she's my friend! Lyric Kinard also gave "Fabric Surface Design" a great review on her blog.

Here's the link to Cheryl's Etsy shop. Cherscapes Etsy shop
You can look through the chapters and get a good idea of how beautifully the book was done. Kudo's to Storey Publishing for seeing a wonderful opportunity in Cheryl's artistic background and down to earth style.

I hope you have a wonderful holiday, whatever you may celebrate!

Tuesday, October 29, 2013

One way to hang a quilt


I recently had a two person show and needed to be able to hang the quilts fairly quickly. The gallery was okay with putting nails in the wall, so I used the same system I use at home.

I like to use Levolor adjustable width pocket rods. They are almost flat and have a hole in each end where the nails can go, and they are adjustable. They come in two different lengths so I keep some on hand for different quilts. I buy them at Lowe's, but I would imagine they are available where ever Levolor curtain rods are sold.

This is the label for the shorter length rod:

The rod slips easily into the sleeve at the back of the quilt:
I put tape on to keep the rod the size it needs to be for that quilt. I can always remove the tape and use it for another quilt in the future. Not sure if you'll be able to see the tape on the rod, but you get the idea...
After holding the quilt up on the wall and deciding on the height and placement, I make pencil marks for the holes. Then I hold the rod up and place a level tool on the top rim. Once I have it leveled, I double check the pencil marks, and put nails in those marks.
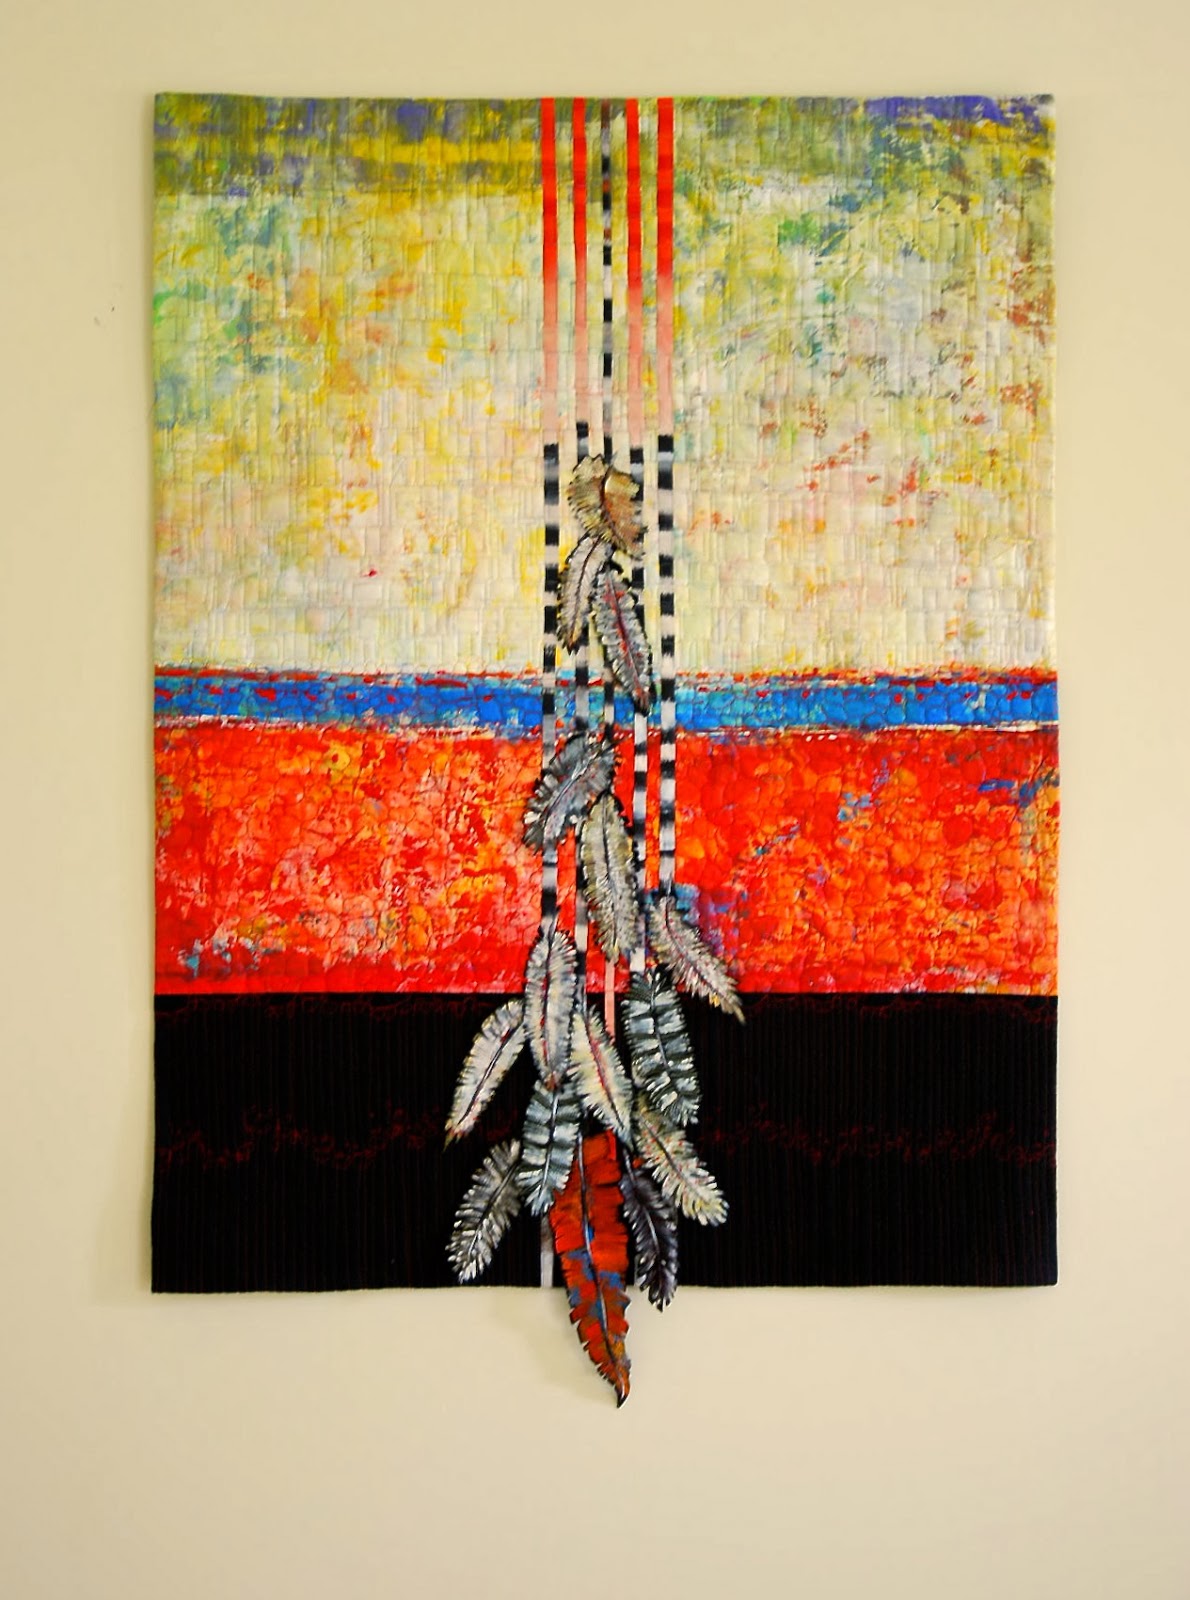
Now I can slide the rod into the quilt and place the nails in the holes and admire my work - or in this case the work of Susan Szajer! I bought this quilt after seeing it in Santa Fe and falling in love with it. I'm planning on painting the wall a little deeper color to show off the quilt, and putting a small chest of drawers under it. Susan does beautiful work - she paints and quilts. I'm so pleased to be able to see this quilt every day.


The feathers on the quilt are 3-D and have a wonderful textural quality to them. Please visit Susan's website to see more of her lovely work: Susan Szajer website and blog.


I hope this was helpful for you. If there are any questions, please put them in the comment section and I'll try to answer them asap!

Tuesday, October 15, 2013

Banksy in New York City

The British artist known as Banksy is in NY City, and is making art every day. He's got an amazingly inventive mind, and sharp sense of humor. There's a film that is sort of about him as well that is a hoot titled Exit Through the Gift Shop

Check his website out for yourself - and see NY differently!
Banksy's New York City Art

Thursday, October 3, 2013

My Yellow Studio

My studio needed a paint job, and I was going to go with the same barn red color it was when we bought the house. That's what I did 5 years ago and it only needed one coat so it was the practical thing to do. But then I thought about how boring it was, and decided to go with a slightly deeper color than my house - on the other side of the driveway.
Here's the finished paint job -
Won't it look great with a hanging basket of flowers on that hook and the window box on the window? Even from inside the house, it looks like it's calling me to come and feel the joy of creating!
Color can have a huge effect on how we feel and I know this color makes me feel happy and full of optimism. The studio floor is painted periwinkle for the same reason. Do you have a color that brings you joy?
I'm one lucky artist to have a space to call my own.
Next time I get the studio in order, I'll post photo's of the interior. Thanks for stopping by!

Tuesday, September 17, 2013

Art Quilts reviewed in Art and Antiques Magazine

There is a very informative, and appreciative review of the history of art quilts, and some of the major artists in the movement in the September issue of Art and Antiques Magazine. The author is Barbara Wysocki, a writer who is knowledgeable about the world of art and quilts.

It starts out the usual way that articles about art quilts begin - "Quilts—the word conjures bed covers made with tiny scraps of fabric stitched together with a layer of batting beneath a geometric or floral design." But,  the second sentence brings the reader into the contemporary world of art quilts. Yeah! "Yet today, a kaleidoscopic range of quilts is being made primarily to be displayed on walls".

For anyone who is interested in learning more about art quilts, it's a broad and well written history. There are interviews with artists, and examples of their work. I heard about the article through the Studio Art Quilt Associates list serve, and am so encouraged to see art quilters getting serious reviews.

Wednesday, September 4, 2013

Starting on a 12" square

When I've been away from the studio for awhile, I like to start working on something small to get me back into the swing of things. It sounds strange, but it is sometimes hard to remember how to start in the studio. It's easier to get the work going when starting small.

The SAQA auction is coming up next week, and although I already submitted a 12" square piece for this year, the deadline often comes and I have to rush to make something. So, I started a 12" piece and if I still like it next April, I'll submit it for the 2014 auction. Here's a link to this year's auction and my piece.  You'll see that it has some of the same fabrics. SAQA 2013 Auction

I think in terms of background, middle ground and foreground as I've noted before. My photography training taught me to be sure there is something interesting in each area, so it's easiest for me to go from there. I photographed the process with my IPhone, so the photo's aren't great, but they are done!
Here's how I started:


I had this fabric and the next one on my cutting table from this year's auction piece.

Added some Misty Fuse to each fabric and ironed them on
Put the smaller pieces on this background and started moving things around.

The next few photo's are of some of the things I tried out and then changed.
I added the yellow piece in the lower area. I liked the thin piece coming down and across. Maybe it's a "J"?

Thought it needed more pop, so I found a fabric in a complementary color. I also wanted to emphasize the horizontal movement.

I added and subtracted blue fabric, and then cut some up to make the line more interesting.

Thought it might need the blue to end the horizontal line

Cut the end pieces smaller and moved the red in and out of the blue shapes.


Ironed them on...always a little scary because it's hard to change anything after ironing.

Auditioned some threads to see what would work
Decided black thread would help the blue shapes come forward more and the contrast would make them more interesting.


After the black thread, I thought it needed "something" else

Added the rectangles and free motion quilted them
Trimmed it to 12" square and ironed some Misty Fuse to black fabric and added it for binding. 
               
The finished piece.

The back - sleeve and all!


I think I probably spent about 8 hours on this all together. Not including dyeing the fabric of course... I'm not fast at dyeing, designing, or finishing. It has worked as a good start to get me comfortable in the studio again.

Do you work in a similar way?