Monday, November 15, 2010
New England Quilt Museum acceptance!
Great news in the mail today - I had two Art Quilts accepted for the SAQA sponsored "No Holds Barred" exhibit at the New England Quilt Museum. I'm very pleased and can't wait to see the full show. It opens in January, and will run through March. The museum prohibits artists from posting images of the quilts until the show opens, so I'll have to wait until January 20 to post photo's. http://nequiltmuseum.org
Wednesday, November 3, 2010
Matting Small Art Work
The New England members of SAQA are making donations for the New England Quilt Museum. The donations are all going to be 11 x 14, with the opening in the mat to be the option of the quilt artist.
My friend Fern Leslie mats and frames most of her work, and was generous enough to show me her method. The supplies are simple: purchased mat (the example is from Dick Blick), thread, small strip of archival sketchbook paper, double sided adhesive tape, and a small art quilt that will fit behind the opening.
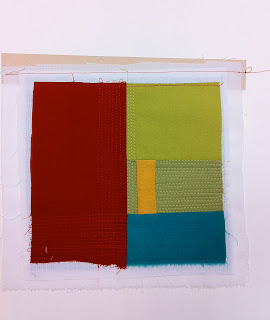
Directions: Cut a thin strip of archival paper, slightly wider than the art quilt. Sew the top of the art quilt to the strip of paper. Place a piece of double sided tape on the back of the strip of paper. This way the fabric does not have tape on it. Draw a line with pencil to guide you to taping the piece of paper to the back board of the mat. See below - the backing of this small art quilt is larger than the front, and the thin wool used for batting.
The art quilt sits better behind the mat if it doesn't have the bulk of a finished edge. Once the art quilt is taped to the back board of the matting, you can either put the double sided tape on the top edge of the mat board, or use a linen tape to hold the front mat board to the back. Be sure to sign your name on the front of the matboard, and include all information about the art on both the back of the art quilt, and the back of the mat board.
Doesn't this look great? Note Fern's signature on the mat, and how neat and finished the whole piece looks.
Subscribe to:
Comments (Atom)

